Posted on 2 Comments

Nativity Block Quilt Ideas!

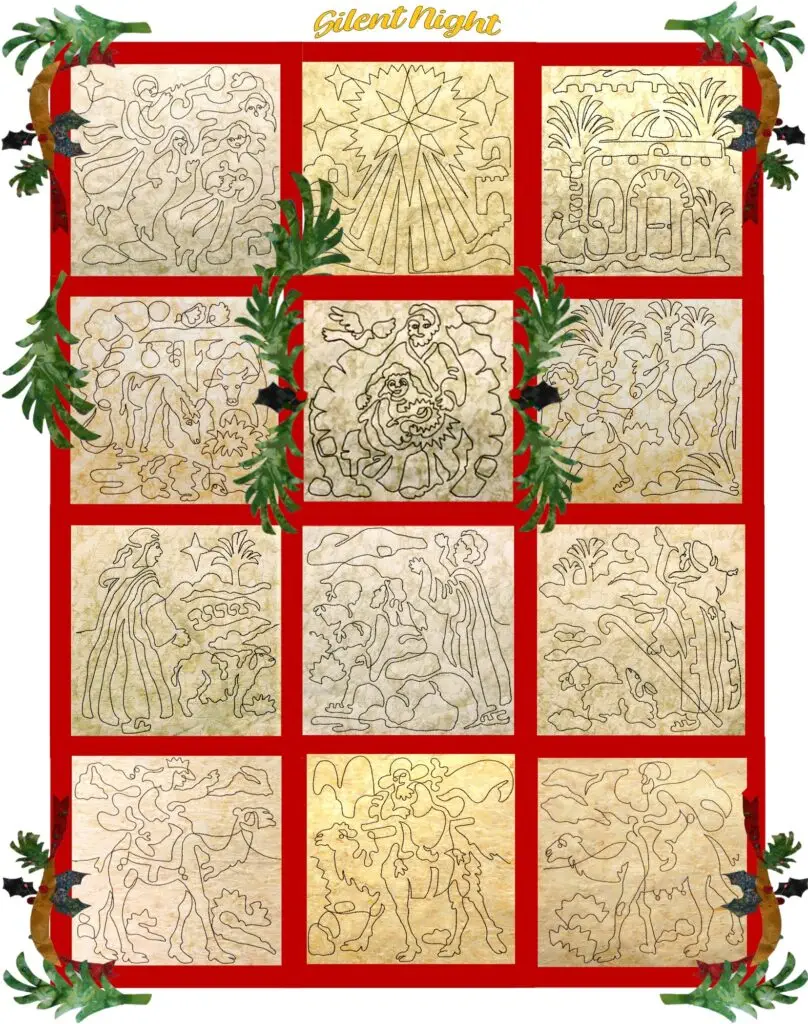
What can we do with these block patterns?
Let’s build a quilt with the free printable PDF Nativity Blocks Download.
WAIT! I’ve decided to offer the Embroidery files FREE for these blocks also.
What a DEAL!

Every few days I’ll highlight another of the block plans. But you can see them ALL, here in my Nativity Block Blog.

Consider Having a Title or not: I like “Silent Night” as well as “Il est Né, le Divin Enfant” You may have an even better idea.
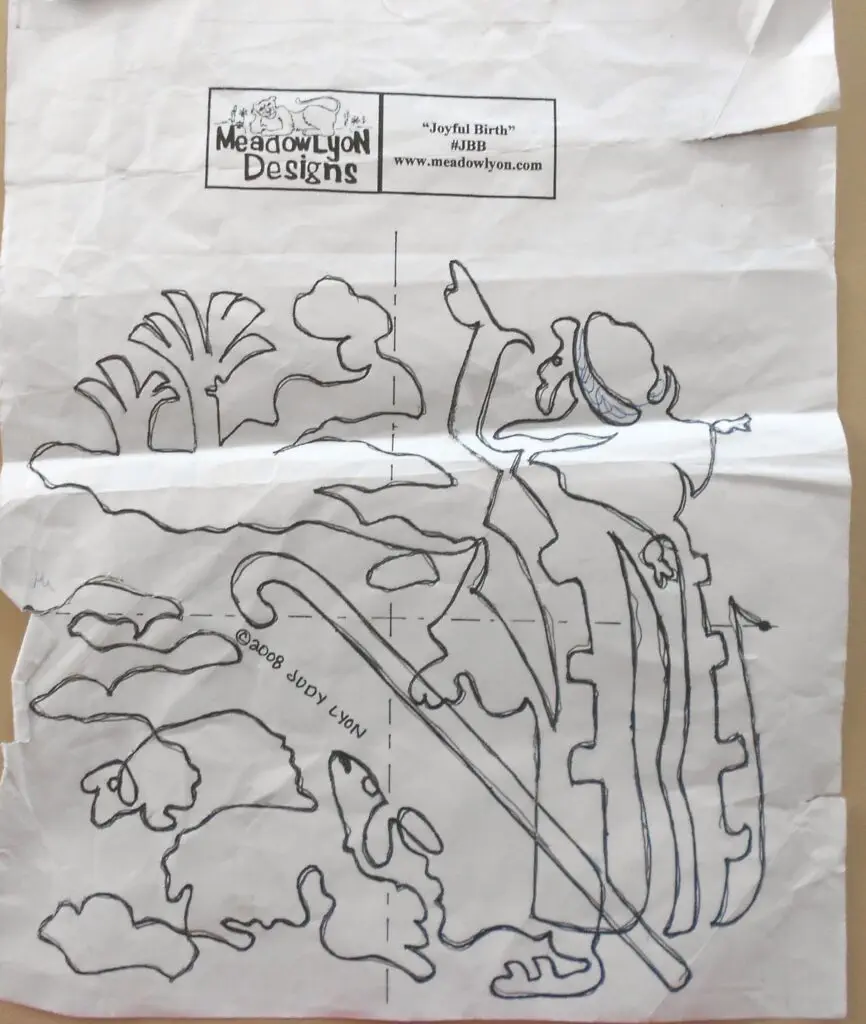
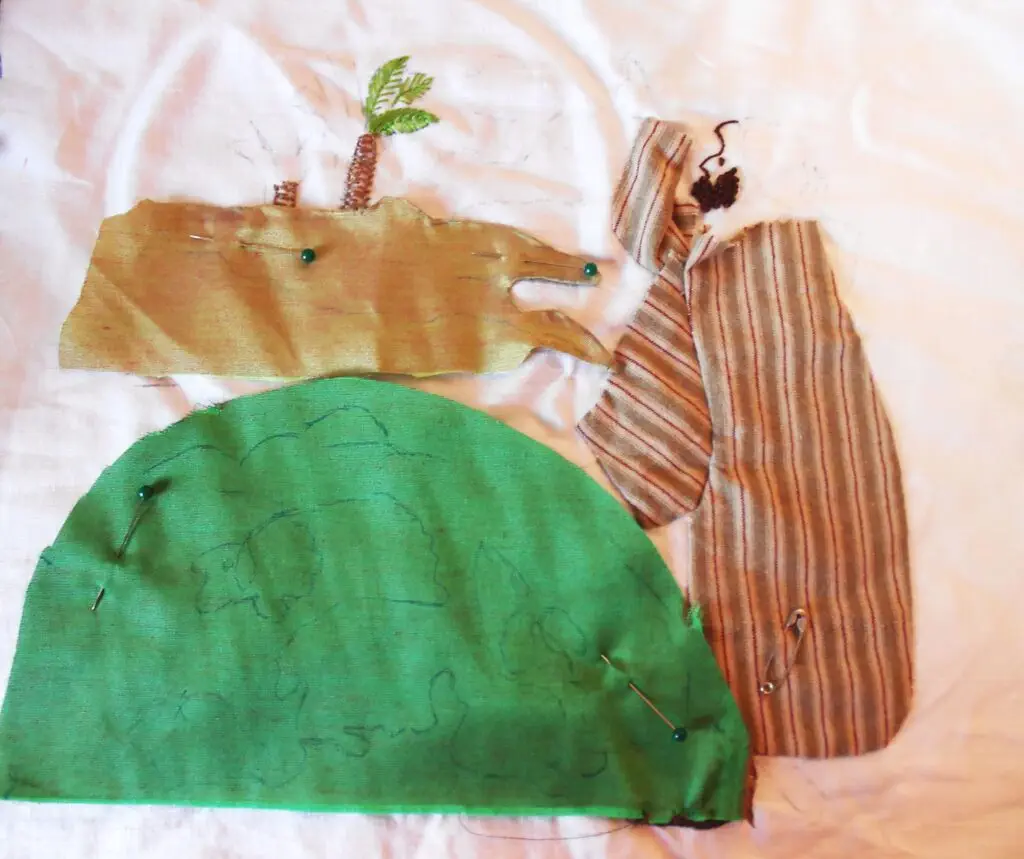
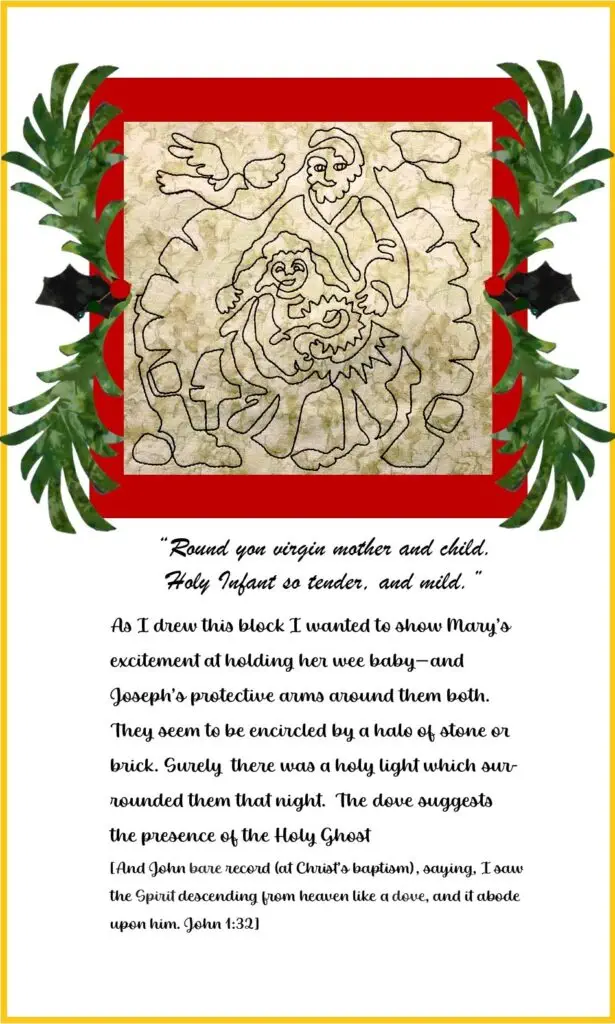
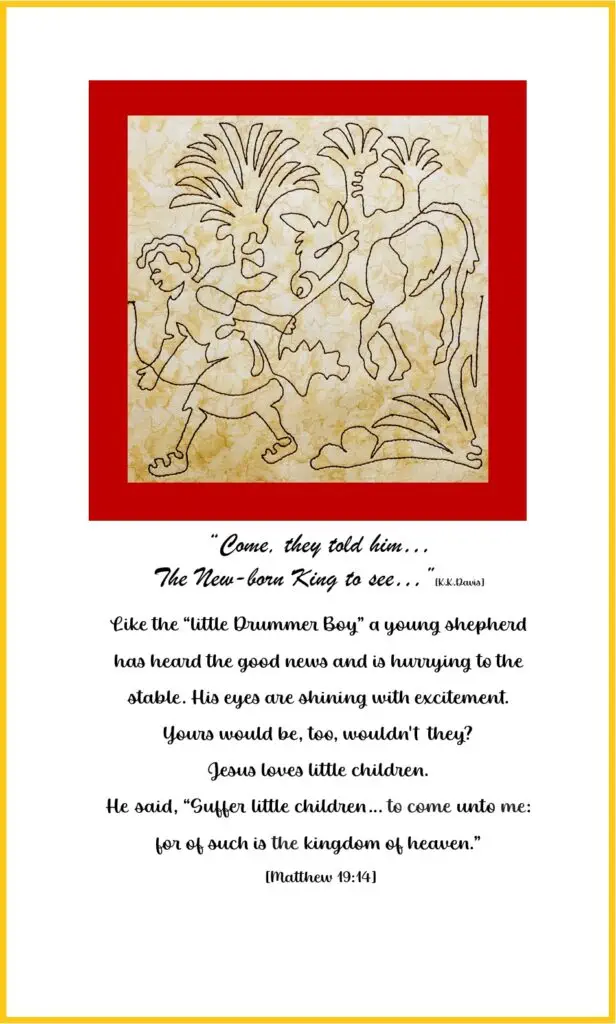
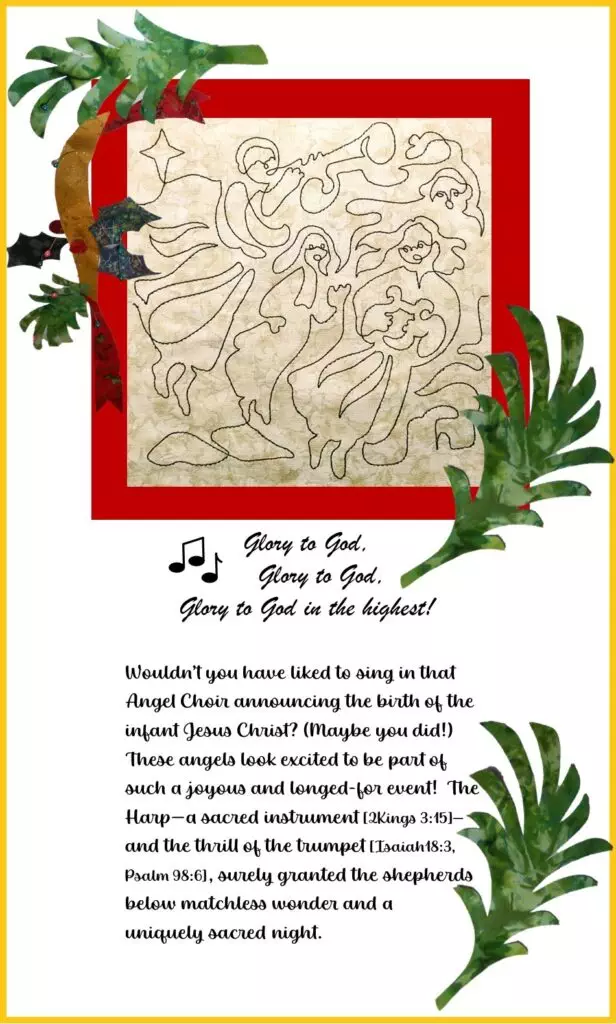
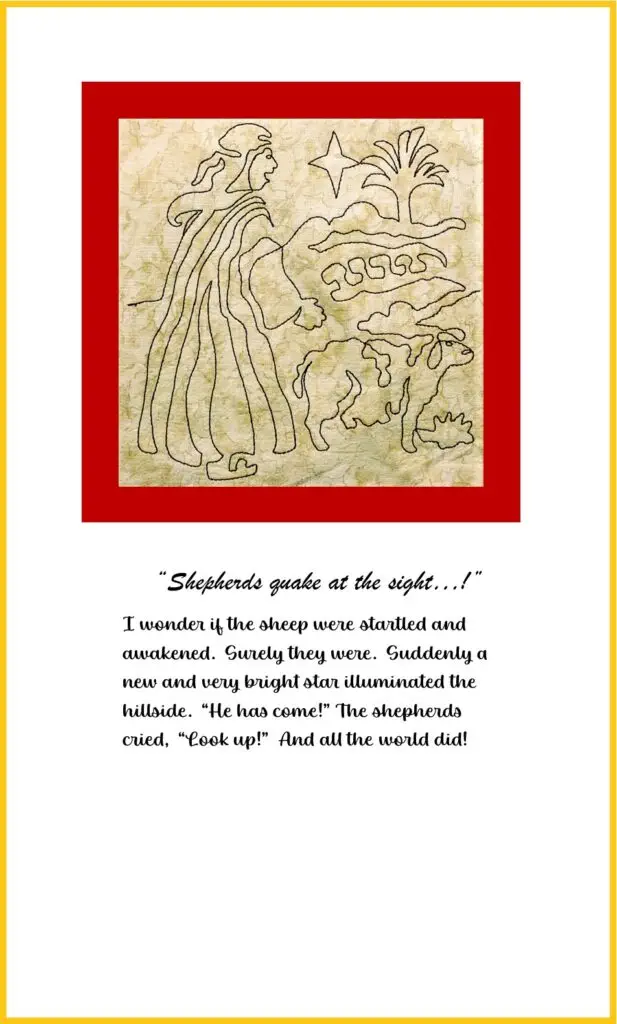
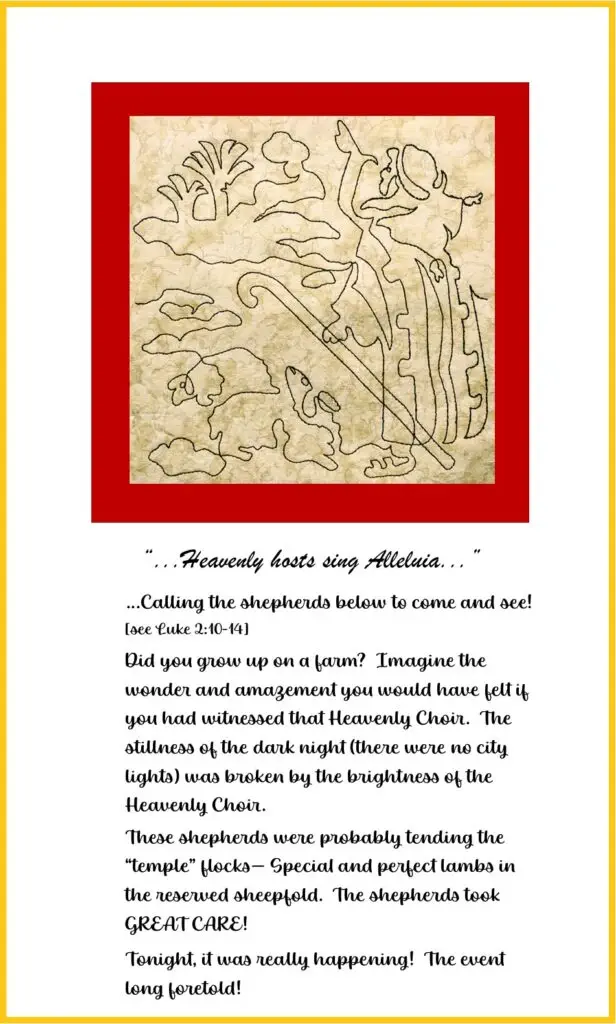
All the time I was drawing these patterns I spent a lot of time in the Scriptures. I wanted to get everything right and to express the joy of this story! I hope yoou’ll feel that way too.

I have other suggestions for using them, too! Read on!

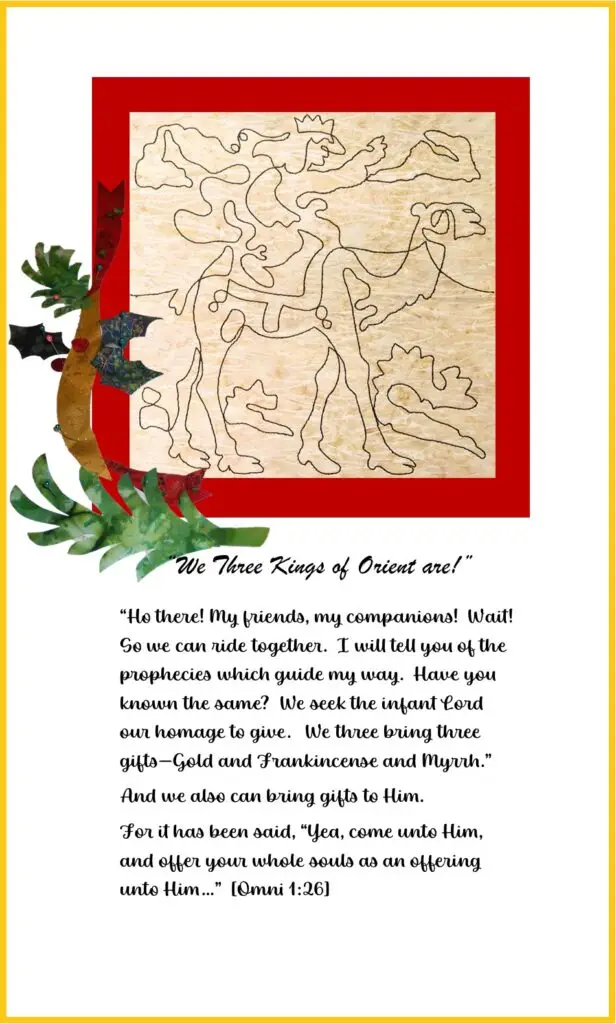
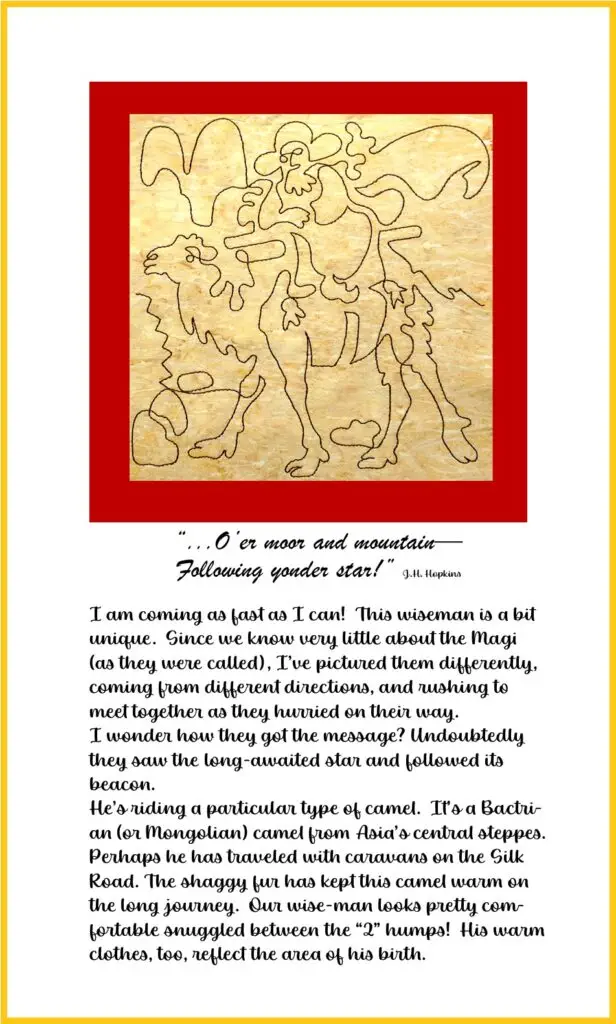
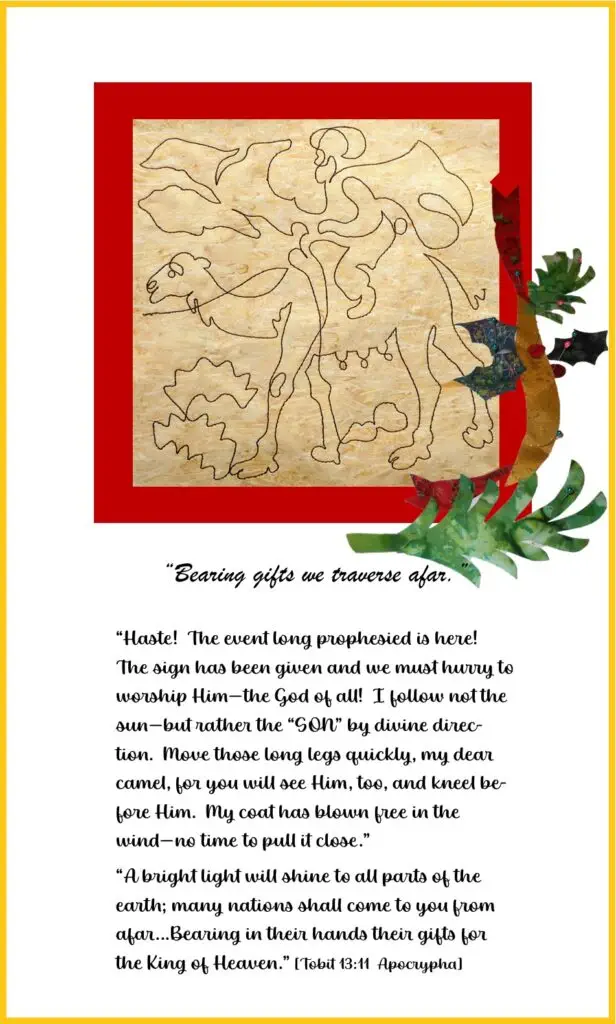
You might be able to tell I was trying to make these Nativity drawings appealing to children. That’s another reason why I’ve described some of my thoughts and feelings about each block. Of course, I don’t expect you to add all that “script” to the quilt, but I wanted you to understand where I was coming from.

Here’s a totally “faked” composite. Even all the blocks are still edited differently! I’d love to see what you do with it!

So what about other ideas now!

Something we did for our family was unroll the full pantograph down the hall and let the kids color the pictures. For these “blocks” I suggest something similar. Let your children color these block pictures. Since they’re free, you can print as many of the blocks as you want. You could even use them for a Sunday School class.

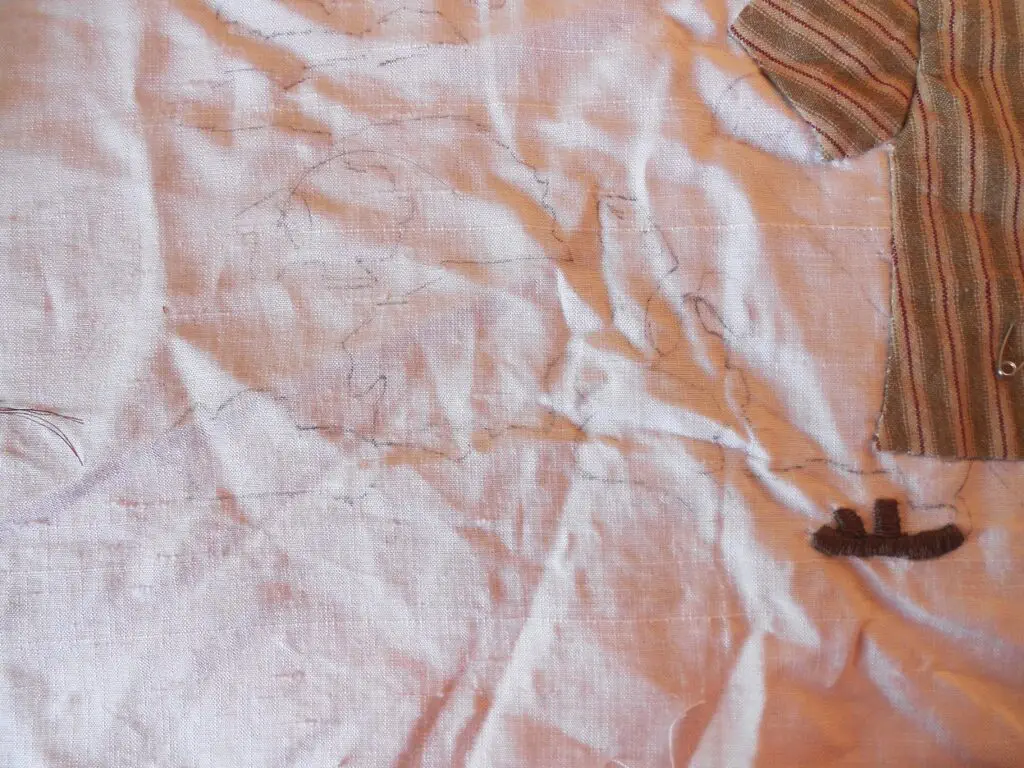
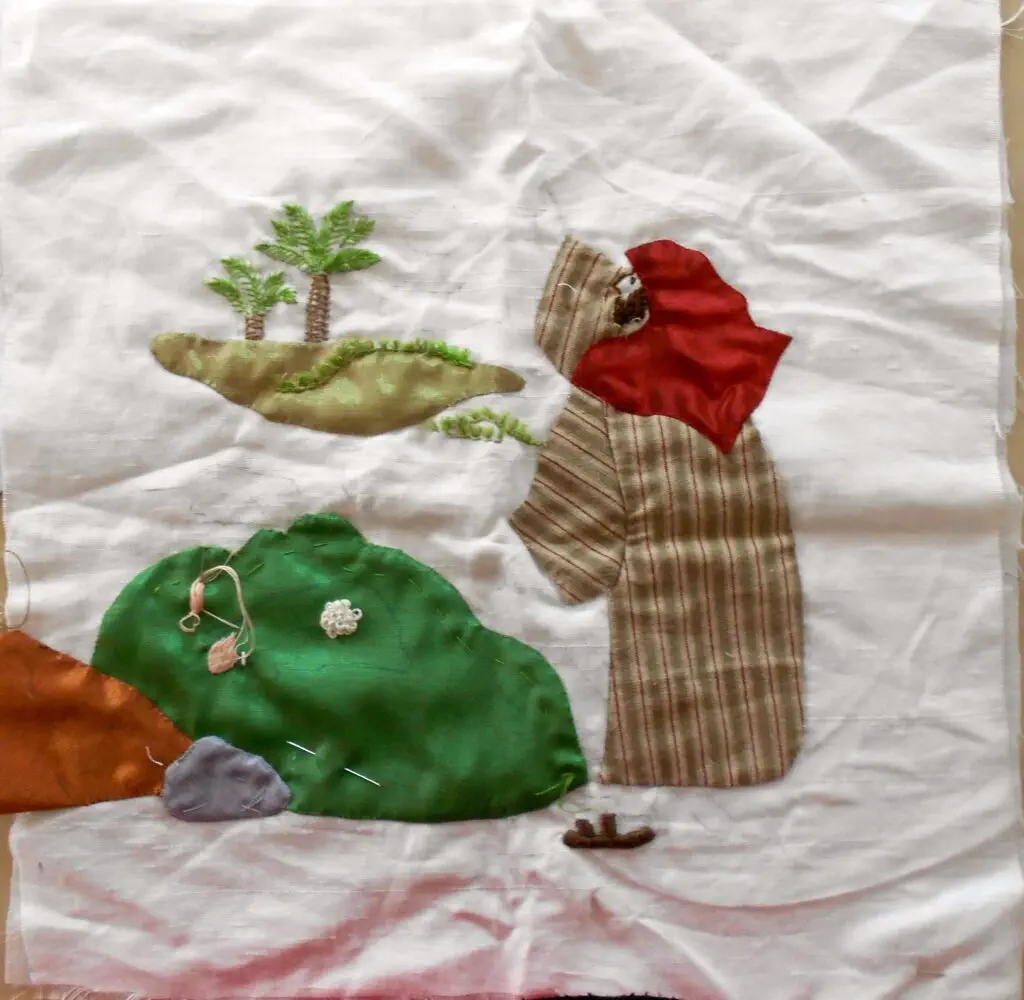
Something else I started was to applique and embroider them. Here are a couple of examples–one very involved and the other “not so much!”

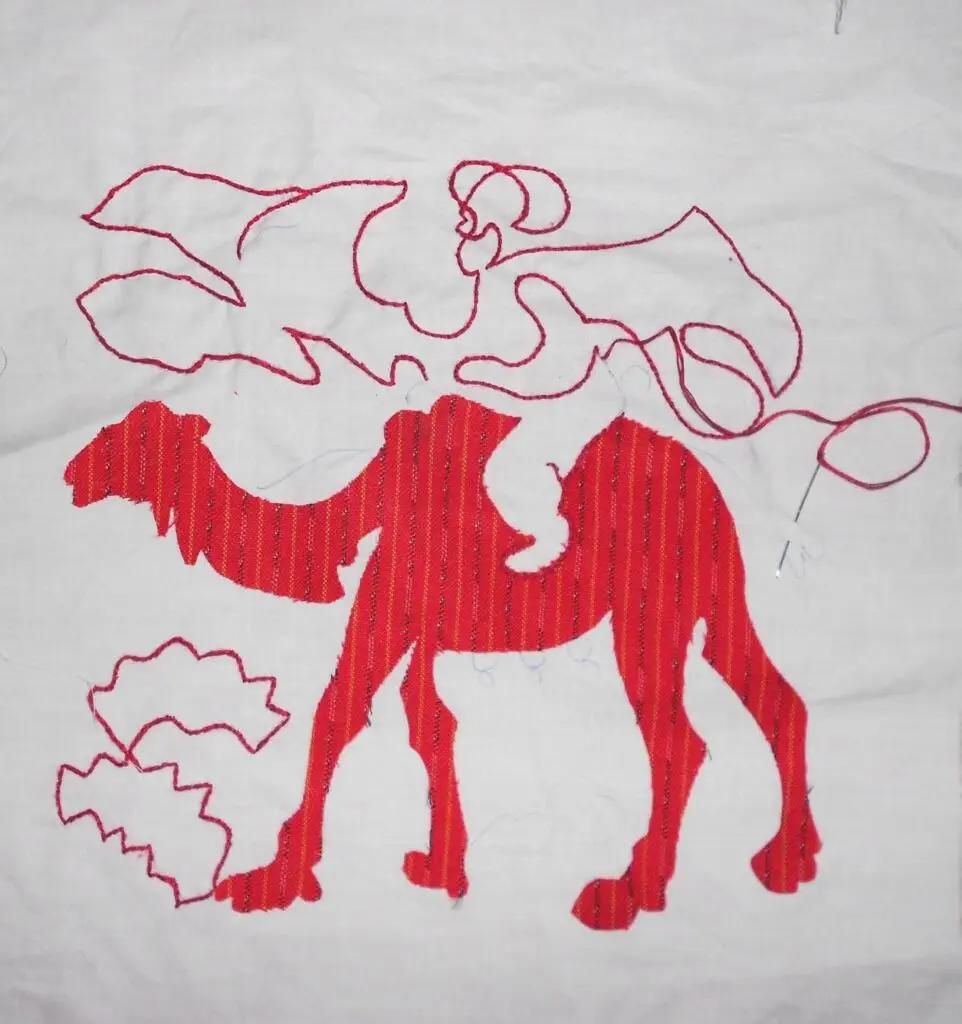
Here are “How-To” steps for the embroidery.

I don’t have pictures of kids coloring the blocks and will try to get some!! But HOW ABOUT paint!

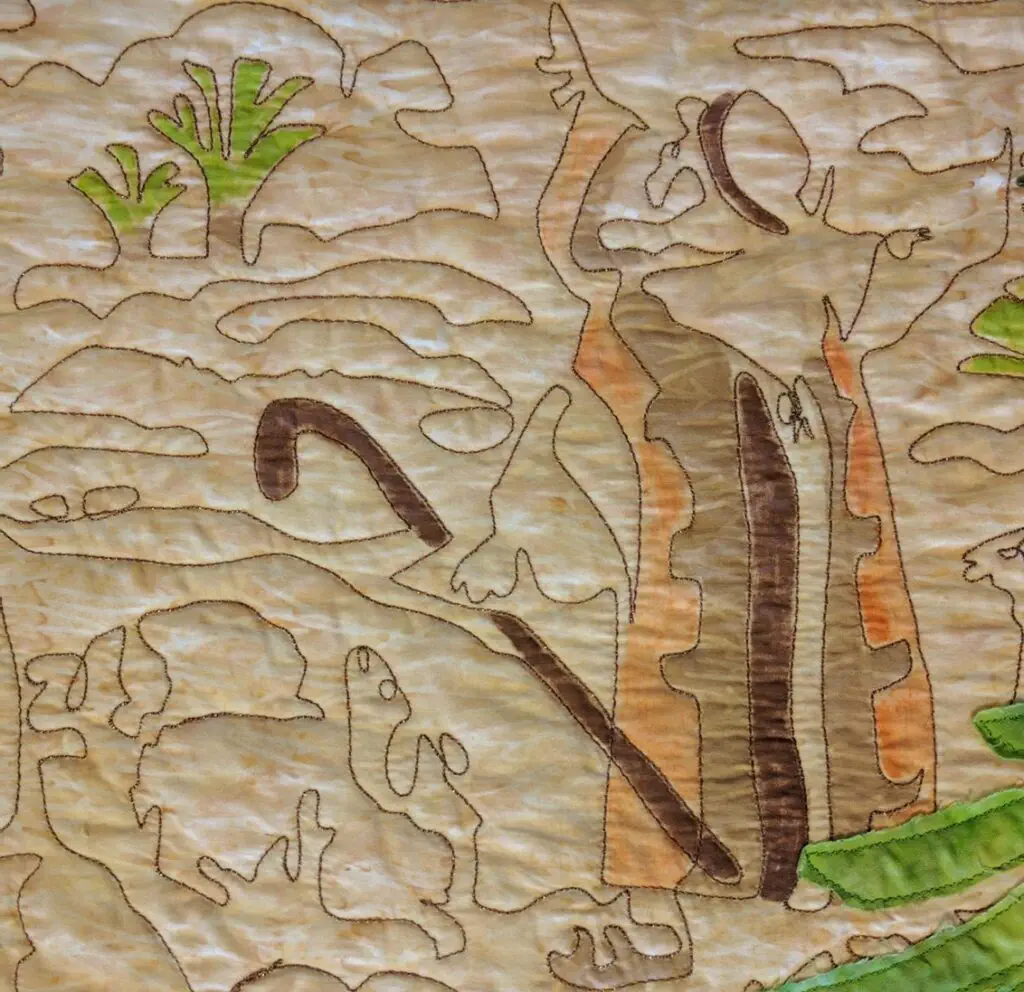
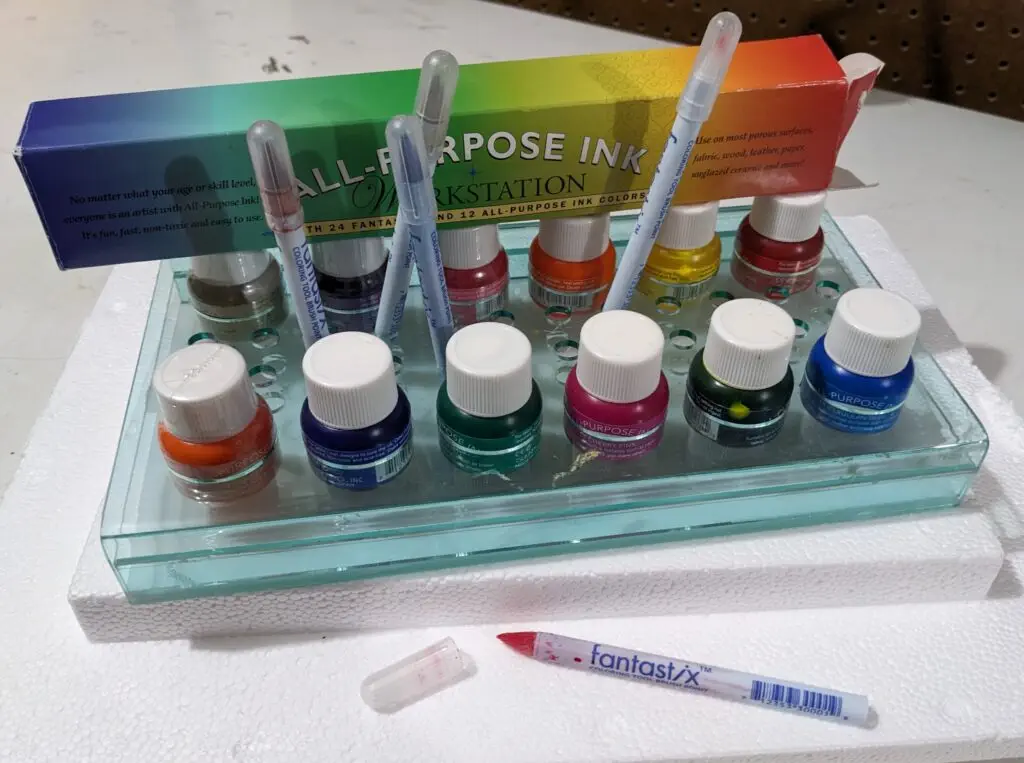
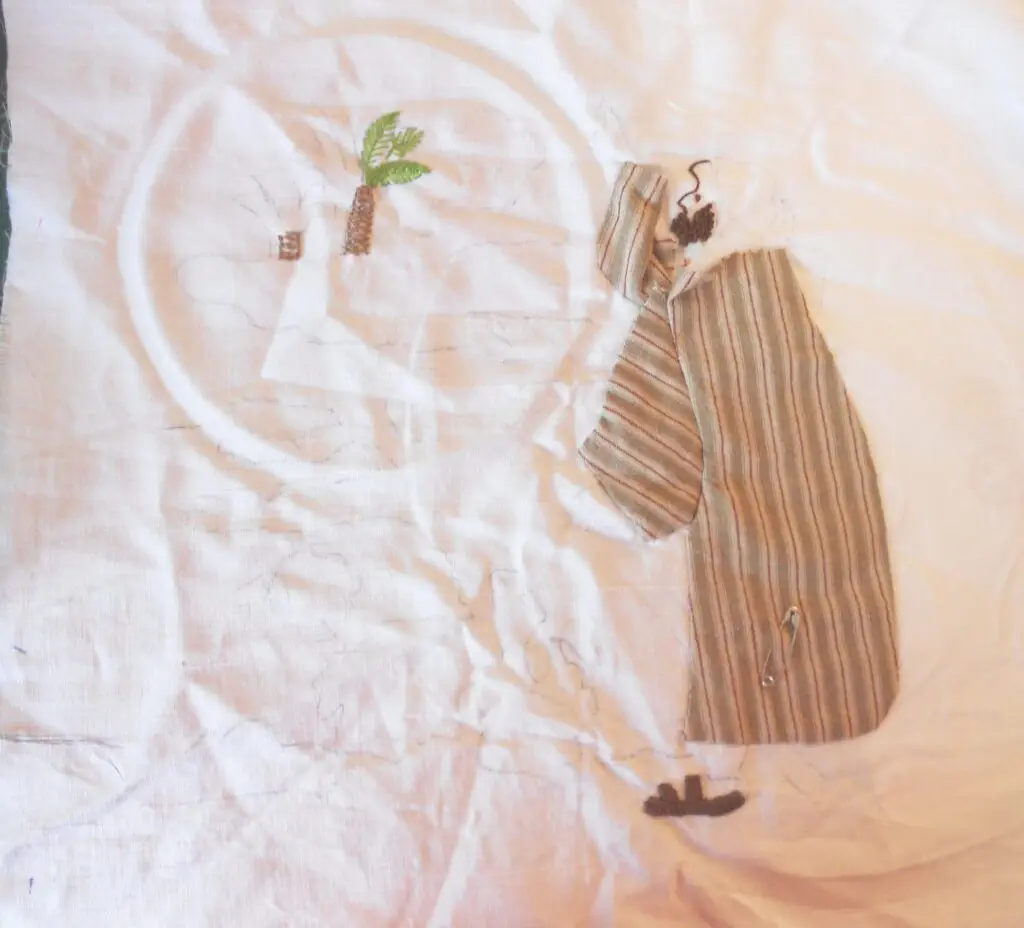
On this shephered I used Tsukineko ink and applied it with their little Fantastix coloring sticks. The sticks are like empty magic markers. They suck up the ink and don’t let it go (or run). It just goes where you want it to go. I find it seldom goes past the stitching lines. (See the example above.)

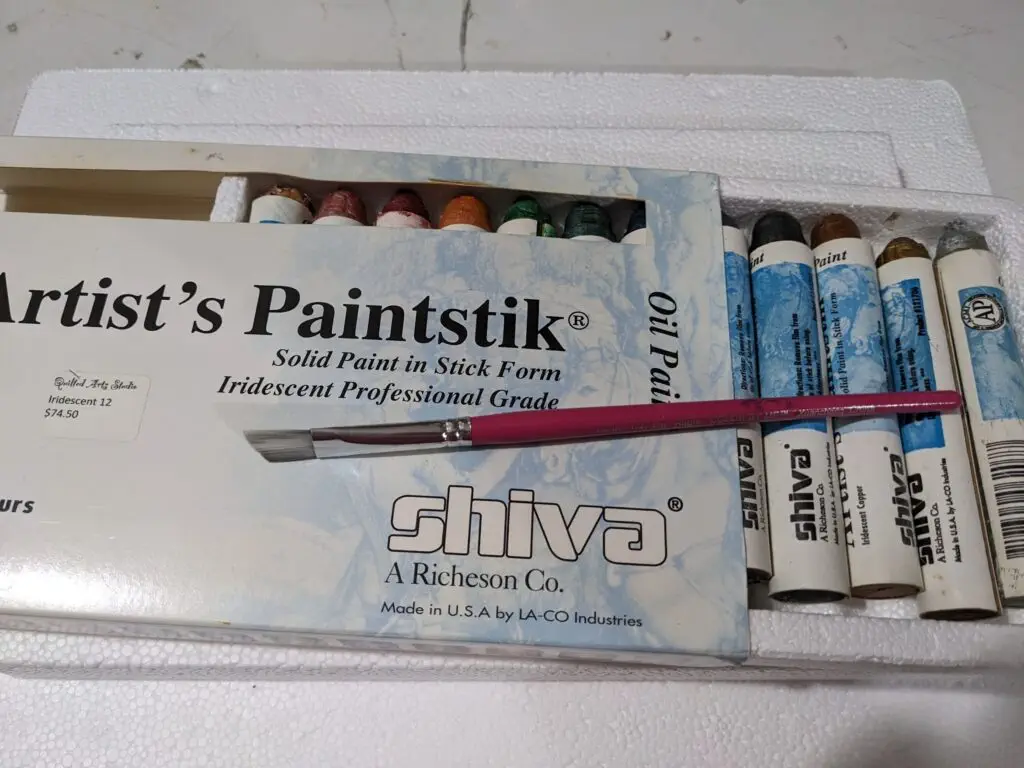
I also like to use Shiva Paintstiks. I NEVER apply the paint like a crayon! I smear it on a paper plate(palette) and lightly brush it onto the quilt with a stiff brush.

Have fun with your kids!

Merry
Christmas!

Posted on Leave a comment

T-Shirt Quilts: Pantos That Work Great! + Best Quilting tips for T-Shirt Success.

Upstairs in my walk-in attic I have a box of T-shirts meant for a quilt or two.  I thought how fun it would be to have a t-shirt quilt for the grandkids to use when they visit.  They’d be sleeping under all the memories of their Mom or Dad.  In particular I have a number of Hawaiian T-shirts and Hawaiian shirts and/or muumuus that he children wore when we lived in Hawaii.   Here’s my plan for those great memory pieces. I’m showing it “virtually” stitched with my “Hawaiian Hibiscus” pantograph.  (I’m including the titles of the Pantographs on the pictures simply for reference.)

Not sure about piecing circles?  I’ve posted a tutorial for adding them.  Don’t worry, it’s not hard!  Making Circular Insets for T-shirt Quilts.     

Another box is filled with old cub scouts t-shirts.  They’d be great and I plan to include some of the neckerchiefs and patches in the piecing (see my mock-up example).  I’m showing how I would stitch it with my 8-inch double “Jitterbug 15 interlocking “ panto.  (You could also use the -one row at a time- “Jitterbug 11 interlocking” panto.)  Doesn’t it look great!  It reminds me of boys at that age, JITTERY!


There are many  standard blocks which sport a square in the middle, so get out your pile of magazines and find a block, or do like I did and open up Quilt-Pro and find a block you like that’s not too time consuming.  Here’s a simple star stitched with one of my favorties, “Maori Moko”.  It’s a 15″ pattern so if you want a smaller one that’s similar choose the 9-inch “Maori Moko Border” and use it as an E2E.  Knit is stretchy anyway, so there’s no problem placing some of the pieces on the diagonal.  Another option would be to include the star points only on the outer corners and fill the center with rows of T-shirts.  However, I like the tilted squares because it adds so much interest!

.   Here’s another idea for a little girls t-shirt quilt.  One is straight placement with colorful sashing on which I over-layed our “Oh so popular”  Flowerburst pattern.  It comes in 2 sizes. “Flowerburst 15” and “Flowerburst 10”  Another is a version of a star block using Drunkard’s Path inserts to give a flower effect. You can actually place your t-shirts in some or all of the squares available.  I over-layed that one with “Dolly’s Tea Party.”

 “Zebra Stripes”   seems perfect stitched over this flaming black quilt.

Just in case you’re making a T-shirt quilt for a guy who’s into cars, like Joe.   FREE -I’m giving you my new “Tire Treads” borders PDF for a limited time.  I didn’t quite finish the “Hub Caps” block but hope to get it done this week.  Oh, gosh! That attic is so full!  “Car Classics”  and Tire Treads are both on this image.  See Sportscars at the end of the blog.

 This is a “Real” quilt.  Finally!  Connie Zwego quilted it in red with the “Snakeskin” Panto.

 Here’s a great T-shirt quilt with Car Classics stitched on it, by Deb Rolek.  I saw her a few weeks ago at the Quilters Musical.

  Or simplify with straight sashing, but make it lively!  “Sports Nut” looks great over all these team shirts!

Okay now, I’ve shown a variety of examples to get you going.  But I do have some real meat to this Blog.  Here are some super “Tips” I’ve gleaned and used over the years to help you along your way.  

Copy and print this section for your files.           Also, see below a list of patterns well suited to T-shirt quilts.   25 are on SALE THIS MONTH. Continue reading T-Shirt Quilts: Pantos That Work Great! + Best Quilting tips for T-Shirt Success.

Posted on Leave a comment

My love Affair With Batiks


My Love Affair with Batiks  By Judy Lyon

A Budding Romance

I first became aware of Batiks in the early 60’s.  Yikes, I’m revealing my age!  I loved to shop at import stores.  The interesting items from all around the world intrigued me.  Their fabric offerings were in the form of stamped batik designs and were used for skirts, tablecloths, and bedspreads.  They were great with the Ravi Shankar music and the incense sticks of the 60’s.  Later, in one of my college art classes the teacher taught actual batik-ing.  For me, it was love at first sight!  My equipment was a tjanting tool (The modern spelling is “canting,” pronounced “chaunting.”), a wooden frame, and a small kettle.  Tjanting tools typically have a wooden handle with a long metal tip composed of a chamber for holding warm wax and a spout extending from the lower end or point.  I used a combination of beeswax and paraffin in the jaunting tool to draw out my designs, mainly paisleys on scarves, etc.  I still have the tiny kettle I used for melting wax.  In fact there’s still a layer of wax in the bottom.  Anyone who really knows me understands.  I don’t throw anything away! “I might need it again,” and I usually do!   Not having an internet was crippling!  The color sequence …….. SEE MORE AS pdfMy Love Affair With Batiks – On Track Magazine spring 2008

So “How do you successfully quilt on Batiks?”

1. Check your fabric to see how tightly or loosely woven it is.  Many made for Quilting” batiks are loose enough to withstand the heavy stitching given to quilts.  But some are not. Although I don’t advocate discarding the tighter fabrics, you’ll need to take extra care.

OLYMPUS DIGITAL CAMERA

2. Use a finer needle to prevent puncturing the threads in a lightly woven fabric. (See the lower side of the purple picture  – you can easily spot holes left in the batik where stitches were removed.)  A ball-point might be helpful- but not too large.  If you encounter “Frogging” the fuzz around stitches indicating broken threads you might be able to make them less visible by using a damp cloth, dotted with silicone and rubbing lightly.  This can be a tricky decision if you have multiple layers of fused appliqué through which to stitch.

3. A silicone lubricant is useful.  Spray on brands are available but difficult to find.  You can apply a few drops of silicone (ie. Sewer’s Aid) to a damp cloth and rub over the quilt surface or apply a few drops to the spool.

4. Loosen the quilt sandwich on your machine slightly.

5.  Batiks are a dream for machine appliqué because as a tightly woven fabric they do not fray easily.  For hand-appliqué they may require a little more effort pushing the needle through the tightly woven folded edge.  Use a finer needle and try some silicone.